Right then, fifth (and final?) blog post. This week I’ve been doing mostly small fixes and balancing changes to the game as I’ve found them, leaving me with less time than I’d hoped to work on particle effects. Nevertheless I have made some progress, and learned a lot. So let’s jump into it! (Note: While the featured image is a particle effects it aint something I made. I just wanted to show what CAN be done using particle effects.)
What?
So what is a particle effect? Well it’s a little hard to explain but I’ll try my best. A particle is essentially a picture that you can manipulate pretty much however you want. Let me show you some examples:
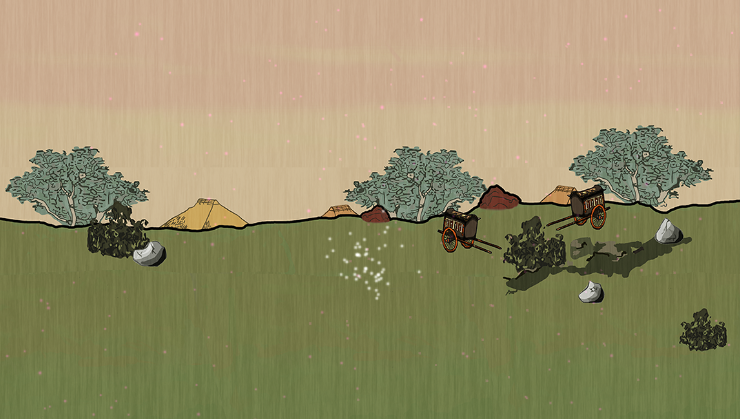 This is real annoying using only still images…anyway the white dots you can see in the middle there is a particle effect. This is what the default particle effect looks like, the one that is there whenever you add a new particle system. As I mentioned earlier a particle is essentially a picture, now in the above example each one of those small white dots is a particle. Or rather they are all copies of the same particle.
How?
So how does it work? Well you pick a picture, or rather a texture, and then using the particle system you manipulate that texture. In the picture I linked what’s happening is the particle system is spawning particles in a square area, and the particles then move outwards. So if they spawn directly below the center of the square they move directly downwards, if they spawn directly above they move upwards and so on. Now I’ve mentioned the “particle system” a couple of times now, so what is it? Well let me show you;
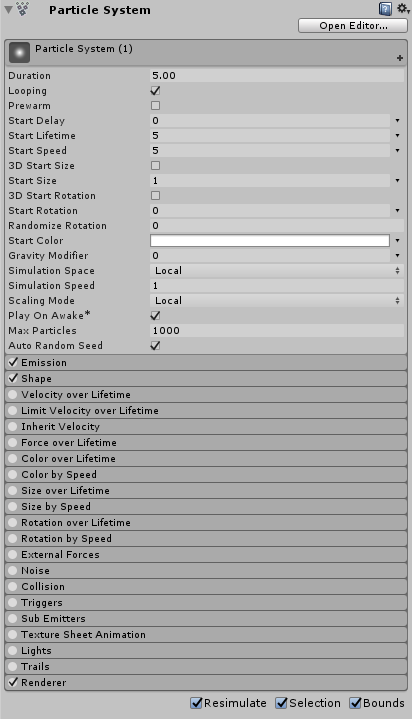
THAT is a particle system. Lot of stuff to take in, right? Well you don’t typically need to bother with EVERYTHING you see here. Most of the time tweaking two or three of these settings will give you what you want, at least in small games like ours. I wont go through what everything here does, 1. because it’d probably take thousands of words and 2. because I’m not entirely sure what everything does either. One important thing to note however are the multiple “over lifetime” settings. This means that the particle will change constantly while it’s “alive”. So by changing “Color over Lifetime” for instance you can give it different colors at different points in its lifecycle. You can also decide wether you want a gradual or immediate change of colors. Another VERY useful thing you can do in several of these “over lifetime” settings is you can assign a so called curve. Now say you want to change the particles position during its lifetime. Making it move in one direction is easy; you just assign a speed to it, but if you want it to move in a certain pattern, back and forth for instance, THAT is when you need a curve. A curve tells the particle to move in one direction for a certain time, and then change its direction at a certain point. You can assign curves to both its x and y position so you can create some really cool patterns, or just beautiful chaos, by playing around with these curves.
Why?
We wanted to add particle effects because we felt our game lacked a lot of feedback, and just visual flair in general. So while my classmate (or co-worker? Naah that sounds weird) focused on the feedback from a pure programming standpoint (such as pushing the enemies back, screen shake and whatever else he can think of) while I focused on the visual aspect, using particle effects.
Now you’re probably wondering why I didn’t use any of my finished particle effects for the pictures. Well the honest truth is because they’re NOT finished. As I said at the start I’ve had to prioritize other stuff for most of this week, like new GUI elements and playtesting along with balancing, but I’ll definitely be working through the weekend. I feel quite confident that I can produce something quite cool if I do, so it honestly doesn’t even feel like overtime. Anyway I guess I might see you next week? The assignment might be over by then but I’m not sure….if it is I guess I’ll see you in the next course! Byeeee!
